Checked by the Top One Trader editorial team, experienced traders and analysts are committed to providing reliable, practical insights for funded trading success.
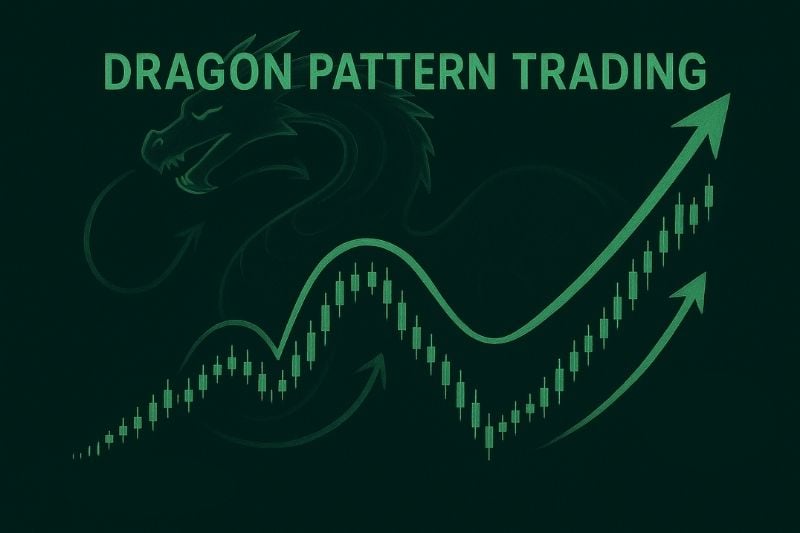
Ever wonder how some traders seem to spot and trade market reversals without fear? Their secret often lies in recognising powerful chart patterns that reveal when momentum is shifting. One of the most effective is the Dragon Pattern, a rare but highly reliable reversal pattern that signals when momentum is changing. Named for its shape, the pattern blends structure and trader psychology, helping identify when markets are overextended.
In this Guide, you’ll learn how the dragon pattern trading setup forms, its key components, and how to trade both bullish and inverted dragons confidently across different markets.
Key Takeaway
- The Dragon Pattern is a rare but highly reliable reversal pattern that helps traders identify early signs of shifting momentum by blending technical structure with trader psychology.
- Mastering this dragon pattern trading setup allows you to recognise both bullish and bearish reversals, plan precise entries and exits, and trade with greater confidence and discipline.
What Is the Dragon Pattern in Trading?
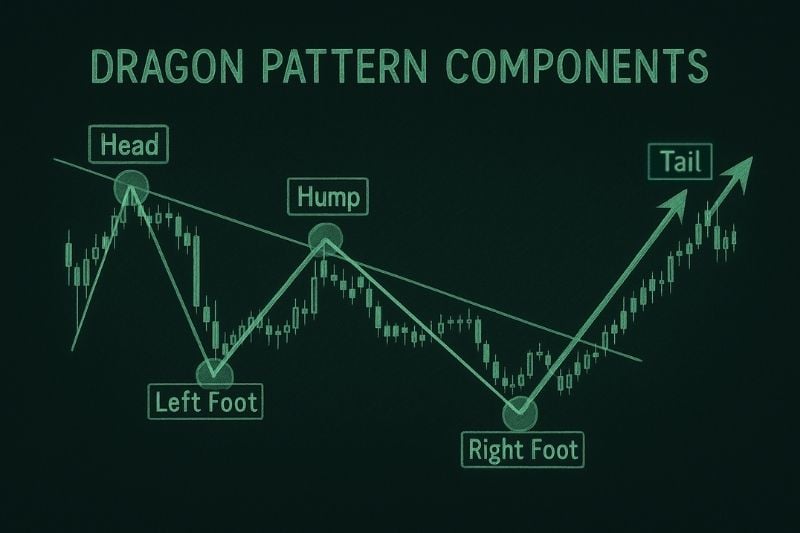
The Dragon Pattern is a price formation that signals a potential trend reversal after an extended move. Visually, it resembles a dragon lying across the chart with a head, two feet, a hump, and a rising tail that marks the breakout.
In a bullish dragon, the pattern appears after a downtrend. The market forms a sharp low known as the left foot, rebounds to a hump, tests a similar low again, forming the right foot, and then breaks higher through the hump line. In a bearish dragon, the structure is inverted.
Traders value this pattern because it is easy to recognise and often appears before significant reversals. It provides a structured approach for identifying exhaustion, planning entries, and setting targets when combined with supporting tools such as volume, RSI, momentum indicators, and candlestick patterns to confirm the setup.
Key Components of the Dragon Pattern
To trade the Dragon Pattern effectively, you must understand each part of its structure. The pattern consists of four main elements that together form its distinctive shape:
| Component | Description | Trading Insight |
| Head of the Dragon | The initial swing high in a bearish setup or swing low in a bullish setup marks the end of the previous trend and the start of a correction. | Signals trend exhaustion and the first sign that momentum may be shifting. |
| Feet – Left and Right | Two reaction points form the base of the pattern. The left foot forms first, followed by the hump, and then the right foot retests the same level. | Confirms strong support or resistance. Symmetry between both feet adds confidence to the setup. |
| Hump | The corrective leg between both feet that acts as the neckline or trendline. | A break above or below this level confirms the Dragon breakout and signals the start of a new move. |
| Tail | A final spike that indicates the pattern is complete. Sometimes the price extends beyond the feet, often caused by high volatility. | Represents an exhaustion followed by a brief correction or a possible reversal. It can act as a strategic level for taking partial or full profits. |
Types of Dragon Patterns
Bullish Dragon Pattern: Reversal from a Downtrend
The bullish dragon pattern emerges after a prolonged bearish move, marking the point where selling pressure weakens and buying strength begins to surface. It often signals the exhaustion of a downtrend and the early stages of a potential bullish reversal.
This pattern gives traders an opportunity to position early within a new upward phase, capitalising on a transition from weakness to strength. The most effective approach is to define entry and exit levels directly from the structure of the pattern itself, with targets often projected based on the height of the hump or the prior swing range.
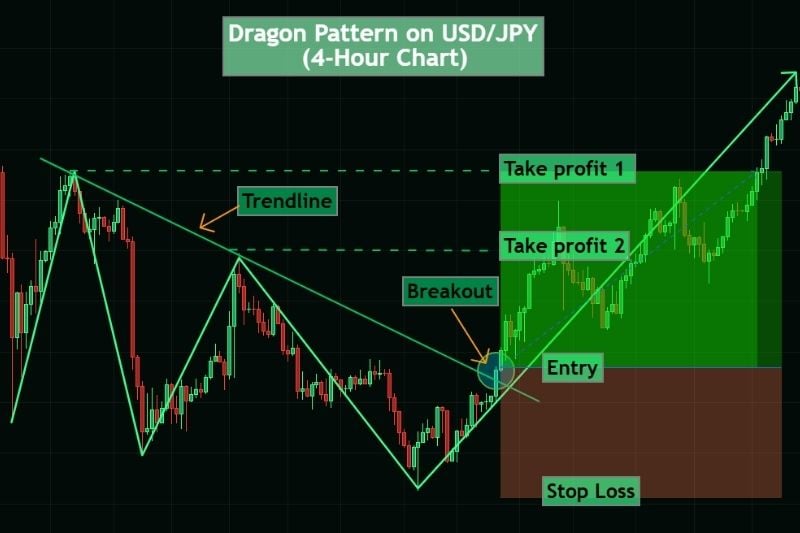
How to Trade the Bullish Dragon Pattern:
- Entry: After price breaks above the trendline, signalling renewed buying momentum.
- Stop Loss: Place it below the last low (right foot) to protect against losses. If the price moves below this level, the setup is considered invalid.
- Targets: The hump can serve as the first target, while the head can be used as the second target. Always aim for a positive risk-to-reward ratio to maintain consistency.
Ready to level up your trading journey?
Join Top One Trader and access expert educational content, transparent rules, and competitive challenge pricing. Learn, trade, and grow with a firm built for serious traders.
Bearish (Inverted) Dragon Pattern: Reversal from an Uptrend
The bearish dragon pattern, also known as the inverted dragon, is the opposite of the bullish setup. It develops after a sustained uptrend when buying pressure begins to fade and sellers gradually take control. This formation signals that the prevailing momentum is weakening and a downside reversal could be underway.
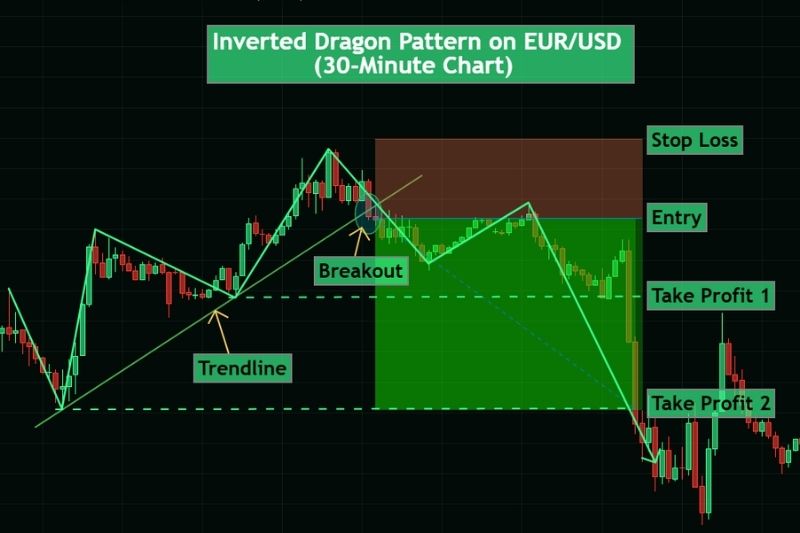
How to Trade the Bearish Dragon Pattern:
- Entry: Once price breaks decisively below the ascending trendline, indicating that buyers are losing control, and a bearish phase may start.
- Stop Loss: Set it just above the right foot to limit exposure in case of a false breakdown. A move beyond this level invalidates the setup.
- Targets: The first target can be projected from the hump area, while the second target extends toward the level of the initial swing (the head). Maintain a positive risk-to-reward ratio to keep your trades sustainable over time.
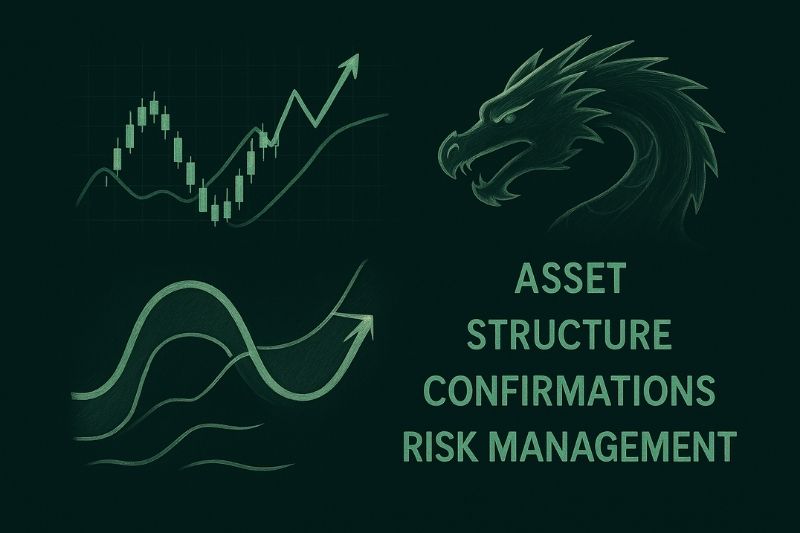
Identifying and Trading the Dragon Pattern with Confirmations
Spotting a Dragon on a live chart requires patience and precision. Many traders rush to call every double bottom a Dragon pattern, but the real setup shows balance, symmetry, and clear confirmation. It forms after a prior trend begins to weaken and signals a potential shift in market strength. The Dragon pattern rewards traders who combine technical skill with trading experience and structured risk control.
Asset
The Dragon pattern can appear across the forex market, cryptocurrencies, indices, stocks, and liquid commodities such as gold. It performs best in assets with steady liquidity and strong price swings, allowing traders to read the corrective movement clearly. Each market behaves differently, so backtesting helps identify where the setup performs best and which conditions favour its appearance.
Liquidity ensures that price swings form smoothly between the dragon’s key points. Volatile markets like gold or crypto create sharper legs that demand tighter management, while indices and stocks offer slower, steadier setups.
Timeframe
The Dragon adapts well to the 30-minute, 1-hour, 4-hour, and Daily charts. Intraday traders can find multiple setups per week, while swing traders gain a cleaner structure on higher timeframes. Combining perspectives improves accuracy, confirming the pattern on a higher chart and executing on a lower one for an ideal entry point.
Structure
A textbook Dragon resembles a double-bottom or double-top divided by a clear hump. The right foot forms near the left, and the head marks exhaustion of the prior trend. Smooth curves indicate a healthy corrective movement rather than random volatility. Patterns forming near major resistance levels or institutional supply and demand zones are stronger, as they align with natural shifts in order flow.
Confirmations
Confirmation separates skill from chance. Traders use multiple forms of evidence rather than relying solely on the visual shape:
• A decisive break of the neckline or trendline confirms structural change.
• A break and retest offers a conservative or long trade setup.
• Rising volume shows real market strength behind the move.
• Divergence on RSI or MACD suggests fading momentum.
• Alignment with resistance levels, supply or demand zones, or fundamental context such as sentiment or economic data.
• Agreement with other technical indicators, like moving averages or Fibonacci retracements, helps validate the pattern’s key features.
These signals vary depending on the market and timeframe, but combining several increases confidence in the setup.
Risk Management
Every Dragon setup must include defined entries, stops, and targets before execution. Aim for a positive risk-to-reward and keep position size consistent. If the breakout fails, the stop loss protects capital and leaves you ready for the next opportunity.
Confluence and Refinement
Accuracy improves when the pattern is supported by confluence tools:
• Fibonacci retracement levels can project targets.
• Moving averages confirm the broader direction.
• Trendline retests allow traders to join momentum without chasing price.
• Volume or order flow indicators highlight where participation builds.
Backtesting remains essential to identify where the Dragon performs most consistently. Review historical charts across different assets and timeframes, and combine technical analysis with awareness of fundamentals such as interest rates, economic data releases, and overall market sentiment to understand both price direction and context.
Mastering these elements turns the Dragon from a simple chart shape into a complete trading strategy grounded in technical precision, contextual awareness, and evidence-based execution.
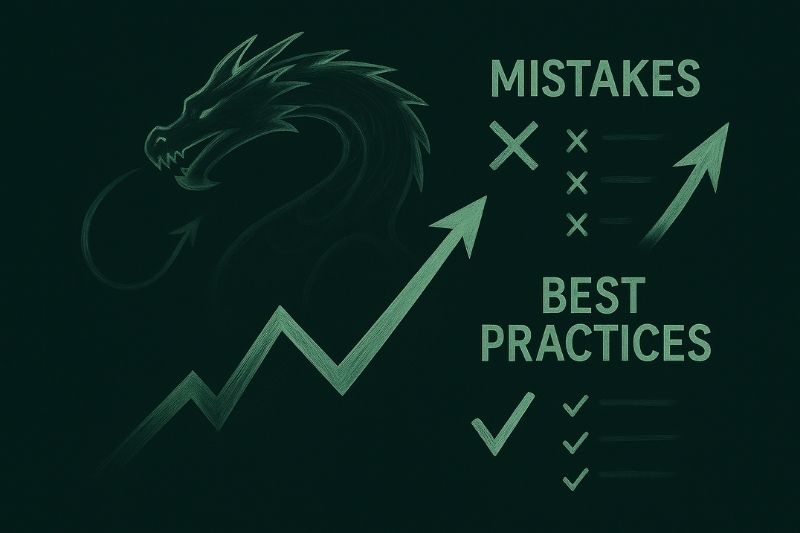
Common Mistakes and Best Practices
Even experienced traders misread the Dragon when emotions interfere. Recognising these pitfalls early protects both capital and confidence, especially for those building trading experience in the forex market. Understanding the structure and context helps filter weak setups and focus on the ones showing real market strength.
Common Mistakes
• Mistaking ordinary double bottoms or tops for Dragons. A valid setup must have proportion, a clear hump, and a defined structure that signals a genuine corrective movement, not a random pause in price action.
• Entering too early. Patience is key. Wait for the breakout and retest or for confirmation, such as RSI or MACD divergence, before taking your entry point. Acting too soon often traps traders before the potential shift completes.
• Ignoring volume or market context. Low liquidity or sudden economic releases can distort signals. Always check session timing and fundamental drivers before entering.
• Over-leveraging without a risk plan. Maintain consistent position sizing, respect your stop loss, and avoid assuming one long trade can recover prior losses.
Best Practices
• Validate the structure on multiple timeframes to confirm alignment with the broader trend.
• Record trades in a journal to track performance and identify recurring biases.
• Compare the Dragon with other technical indicators to understand its key features and limitations.
• Prioritise setups near major resistance levels or supply and demand zones for stronger confirmation.
• Focus on quality, not quantity. One precise setup with sound risk control is more effective than several uncertain opportunities.
By combining patience, awareness, and measured exposure, traders can apply the Dragon pattern within a structured strategy built for consistency and sustainable growth.
Final Thoughts
The Dragon Pattern reflects the balance between exhaustion and renewed strength in the market. When understood through solid technical analysis, it helps traders recognise when momentum fades and a potential reversal is forming.
The dragon pattern consists of clear structural elements that, when studied through practice, backtesting, and sound risk management, form the basis of an effective trading strategy across the forex market, indices, stocks, and crypto.
With discipline and patience, the Dragon becomes a framework for understanding market behaviour and price movement. Combined with confirmations, structure, and context, it guides traders toward better decisions, steadier performance, and the consistency needed for long-term profitability.
Join thousands of traders who trust Top One Trader!
Choose from flexible challenges, enjoy quick payouts, and get ongoing educational support. Your path to consistent trading starts here.